


Key Takeaways
- Inconsistent or rapidly changing water temperatures frequently indicate a failing thermostat. Monitor temperature fluctuations at various faucets and record events for your technician.
- If you have no hot water and the power is on, it implies that the thermostat has failed after eliminating tripped breakers and supply problems. Check power and record outage frequency before replacing parts.
- Lukewarm or unexpectedly scalding water is a good sign that your water heater thermostat isn’t regulating the temperature properly. Test actual tap temperatures, compare against settings, and adjust or replace the thermostat.
- Thermostat problems can be accompanied by strange noises from the heater when it’s heating. Listen for popping or hissing and observe if sounds occur during temperature increases.
- Conduct a systematic diagnosis with safety by combining visual inspections, temperature measurements, and multimeter tests while power is off. Document all results to inform repair or technician consultations.
- Ignoring thermostat problems can lead to increased energy costs, early burnout of heating elements, strain on pipes and hazards like scalds or electrical fires. Consider surge protection, periodic wiring inspections, and replacement when it’s old.
Signs your water heater thermostat is failing are temperature fluctuations, excessive cycling, or high energy consumption. Short hot-water supply, water that’s too hot or too cold, and a pilot light that won’t stay lit on gas units are all signs your water heater thermostat is going out.
Aging tanks and bad wiring increase the danger. Catching these problems early will save you money and avoid destruction. Below are symptoms along with helpful checks.
The Telltale Signs
A dying water heater thermostat usually gives obvious, quantifiable indicators. Here are a few points explaining the most telltale signs to monitor, why they are important, where you are most likely to find them and how to record them for diagnosis or repair.
1. Temperature Fluctuations
Watch for sudden, erratic temperature fluctuations in your showers, dishwashing, or laundry. Sudden hot to cold or cold to hot swings, with no change in tap settings, are telltale signs the thermostat may not maintain a set point.
Log every time hot goes cold, or cold goes hot unexpectedly. Remember the time of day, which faucet, and recent appliance use. Check water temperature consistency on other faucets. If the shower and kitchen sink differ, that reduces a problem to thermostat zones or wiring and not a fixture.
List occurrences of instability on a simple log: date, time, faucet, observed temperature behavior. This assists a technician in identifying trends and separating thermostat malfunction from supply or mixing valve issues.
2. No Hot Water
Check if the water heater is on and gives no hot water. Verify that both upper and lower thermostat on two element electric tanks are properly set. If both report accurate settings but water is still icy, the thermostat or heating elements are likely defective.
Eliminate other causes, such as tripped breakers, blown fuses, and pilot light on gas units, before accusing the thermostat. Note the amount of time and frequency of hot water loss and whether it’s complete or partial. Intermittent total blackout frequently indicates thermostat or electrical malfunctions.
Keep in mind age. Units over 10 years with recurring no-hot-water events should be considered for replacement rather than repeated repairs.
3. Lukewarm Water
Recognize when water never heats up, remaining perpetually lukewarm even after prolonged runs. See if changing the thermostat setting affects the output. If it moves the setting but not the temperature, your thermostat needs calibration or replacement.
Pay attention if tepid water prevails irrespective of request or hour. Compare calibrated output with thermostat setting. Water heaters that cannot reliably heat to 49°C (120°F) are problematic.
Hot water that’s rusty or smells bad frequently goes hand-in-hand with performance declines and indicates internal corrosion or bacterial contamination.
4. Scalding Water
Be on the lookout for water that’s searingly hot — a burn hazard. Determine if the thermostat is not shutting off maximum temperature limits or if highs are reported subsequent to recent settings.
Determine if scalding is immediate post-tweak or random. Unregulated hot exhaust is an obvious hazard. List risks: burns, damaged plumbing components, and increased pressure on relief valves.
For the older units, especially those pushing ten years and beyond, replacement might be safer than repair.
5. Unusual Noises
Hear popping, hissing, or banging from the heater when firing up. A relationship between noise and temperature fluctuations can indicate sediment buildup or failing thermostatic controls that allow elements to overheat.
Find out if any noises continue after the tank is flushed. If sounds cease following servicing, sediment was probably the culprit.
If noises persist and accompany other indicators, such as temperature fluctuations, leaks, and heating troubles, thermostat malfunction is more probable.
Remember leaks, rusty or stained water, and minor drips are the warning signs that often come before catastrophic ones. A drip today can be a flooded basement tomorrow.
Diagnostic Steps
Start with a brief plan: a written checklist, required tools, and a safety verification. The checklist should record each step, anticipated outcome, actual outcome, duration, and pictures.
Collect screwdrivers, insulated safety gloves, a low-ohm capable multimeter, an NCV (non-contact voltage tester), a basic thermometer, and a photo camera or phone. Shut the heater power off at the breaker and confirm the supply is dead with your multimeter before ever touching a wire.
Visual Check
Examine the thermostat housing, terminals and adjacent wiring for burns, melted insulation, corrosion or apparent deformation. Check for moisture or rust on the access panel, tank top and thermostat mounting.
Moisture is typically an indicator of a leak which can short components. Inspect the runner wire between upper and lower thermostats for fraying or loose connectors and use the NCV to verify no live voltage on that conductor once power is off.
Photograph each defect and label the images to checklist entries so they can inform repairs or a tech later.
Temperature Check
Check water temperature at cold and hot tap with a trustworthy thermometer. Allow the tank to settle for approximately an hour prior to testing if you suspect a stuck upper thermostat.
A trapped upper thermostat will produce a very steep temperature gradient. Measure and compare temperatures to the thermostat set point, logging readings with time stamps.
Test at various times throughout the day and after intervals of use for variance. Intermittent hot then cold water typically indicates a thermostat problem as opposed to a heating element. Record all readings in our checklist and note any patterns or sudden changes.
Multimeter Test
Put your multimeter in its lowest ohms setting, which should span 0 to 50 ohms. With power off and confirmed, test continuity across thermostat terminals.
An open circuit typically indicates both thermostats are working. A reading less than 1 ohm suggests the upper or both are stuck closed. Roughly 20 to 30 ohms points to the lower thermostat stuck closed.
Check voltage supply to the thermostat with power temporarily restored if safe, or confirm not present before proceeding. If you get a high resistance reading, repeat the measurement to rule out contact issues and to help determine if the lower thermostat is broken.
Record all meter readings, read results on the checklist, and indicate if you need to call in an expert. If you are not certain at any step, take the TV to a competent technician for diagnosis or repair.
Common Causes
Thermostats break down for several obvious reasons. Below is a short context before the subtopics: failure comes from normal wear, electrical events, moisture exposure, and poor wiring or connections. All of the following causes impact thermostat accuracy, safety trips, or total loss of heating.
Age
Thermostats typically begin to deteriorate after roughly 8 to 12 years of service. Parts wear out, bimetal strips fatigue, contacts become pitted, and calibration shifts. Track installation dates and schedule replacements as routine maintenance because unexpected breakdowns occur at or near the unit’s 10-year life expectancy.
| Component | Typical lifespan |
|---|---|
| Thermostat assembly | 8–12 years |
| Electric elements | 6–10 years |
| Tank (storage) | ~10 years |
Replace thermostats proactively at the 8 to 12 year mark. Mark installation dates on the heater label or in service logs. A stuck upper thermostat can induce a sharp temperature gradient. If the upper reads high and the lower reads low, test both to confirm end of life.
Power Surges
Electrical storms, grid switching or nearby equipment faults can send voltage spikes into the heater controls. Surges can burn or melt thermostat components, damage internal circuits and generate unstable readings.
After a storm, check for a burnt smell or any discolored parts or melted plastic. Check for damage at the thermostat and surrounding wiring. Put in a whole-home or dedicated surge protector for the heater to avoid repeat damage.
Check other recent appliance failures, such as microwave resets, flickering lights, or ruined chargers, to chart the extent of the incident.
Water Damage
Leaks and condensation in the vicinity of the thermostat cause corrosion, rust, and short circuits. Leaks are usually in plain sight and a common indicator that the water heater is going bad.
Not every leak spells immediate failure. Rusty, muddy, or foul-smelling hot water is another indication of interior corrosion that can extend to controls. Check around the thermostat for corrosion, rust, or wet insulation.
Don’t delay in replacing any water-damaged wiring or insulation. Address plumbing leaks and plumbing mistakes quickly to prevent recurring thermostat failures and minimize tank damage.
Loose Wiring
Loose or corroded connections cause intermittent contact, arcing and heat at terminals, which degrade thermostat performance and can cause controls to trip erratically. Inspect all screws and terminals for looseness.
Tighten loose connections back into good contact. Search for ‘burn marks’ or arcing discoloration. Use a clamp meter and when necessary verify voltage with the proper tools, as induced voltage can provide a false NCV reading.
Plan regular wiring inspections to detect looseness prior to leading to failure.
Thermostat vs. Other Issues
Thermostat vs. Other problems – separate thermostat failure from other faults by observing heater behavior over time, heat distribution inside the tank and electrical measurements. Use simple, repeatable steps: observe temperature swings, measure at different points, and test electrical continuity with the power off. These checks indicate what to repair and where to begin.
A bad thermostat frequently exhibits uneven water temperatures. You might find scalding hot water, then cold, then lukewarm all within hours. Observe how it performs through multiple cycles or a couple of hours. If the upper thermostat is jammed, the top of the tank will be blazing hot and the bottom cool.
Allow the tank to sit for approximately an hour prior to remeasuring to give the layers time to settle and obtain a clear gradient reading.
- Use a multimeter to isolate thermostat issues from heating element or power issues. With power off, test continuity across each thermostat. An open when the thermostat should be closed indicates the thermostat’s working by design.
Shorted or no continuity when it should read continuity indicates a bad thermostat. Check element resistance: a very high or infinite reading usually means a failed element. Induced voltage or poor meter technique will give false readings, so double check meter leads, repeat tests, and compare to anticipated resistances for your particular model.
Compare symptoms to guide your repair decision:
- Thermostat failure includes irregular temperature swings, a steep tank temperature gradient, room-to-room or time-based fluctuations, a multimeter showing abnormal continuity patterns for the thermostat, and upper/lower thermostat tests pointing to one unit.
- Heating element failure: steady cold water or reduced hot volume, no large gradient in tank, element resistance out of spec or open circuit on element, thermostats test normal.
- Power supply/electrical issues: complete loss of heat, no power at the unit, tripped breaker or blown fuse, voltage tests show missing supply. Multimeter indicates no supply voltage, but thermostats and elements test fine.
- Sediment or tank issues include slow recovery, strange noises, reduced heating efficiency, and not large temperature swings. Inspection and flushing show buildup or corrosion.
Cross sediment and tank out of the list before swapping a thermostat. Flush the tank to destale and test again, because thick sediment can blanket elements and simulate thermostat or element failure.
Inspect for leaks, corrosion, and physical damage to the tank walls. If diagnostics indicate a stuck upper thermostat, replace or recalibrate that thermostat first, because a stuck upper unit will produce an obvious gradient and impede recovery.
The Ripple Effect
A failed thermostat in a water heater doesn’t operate in a vacuum. Like a pebble in tranquil water, a minor defect can create ripples that reach efficiency, expense, appliance lifespan, and the plumbing system. This ripple effect in social systems, economics, and physics makes a single alteration ripple into a series of connected consequences, some difficult to anticipate.
The thermostat affects how the heater cycles, how long elements run, and hot water delivery, shifting the ripple up through the whole system.
Energy Waste
If the thermostat misreads temperature or fails to shut off, heating cycles extend and energy consumption increases. A rough example is that if element run time increases by 20%, a household that used 200 kWh monthly for water heating may see that climb to 240 kWh, adding measurable cost over weeks.
Monitor monthly utility bills and compare to baseline usage to identify spikes associated with thermostat malfunctions.
- Repair or replace the thermostat as soon as possible to reestablish proper cycling.
- Insulate the tank and pipes to minimize heat loss while the thermostat is broken.
- Lower the setpoint a few degrees until repair.
- Add a smart timer or controller so you don’t heat when you need to.
- Schedule annual checks with a certified technician.
Fixing the thermostat reduces waste immediately by preventing unneeded element run time. Swapping out a defective unit can return a rapid return on investment when you factor in energy bill savings and less strain on components.
Appliance Strain
A thermostat that over-drives the heater pumps elements and controls into extended, hot cycles. Heating elements get wear from the repeated high temperatures. Tanks experience quicker sediment bake-on.
Relays and thermostatic switches last through more switching cycles. Early wear manifests itself in noisy operation, longer heat-up times, and uneven water temperature.
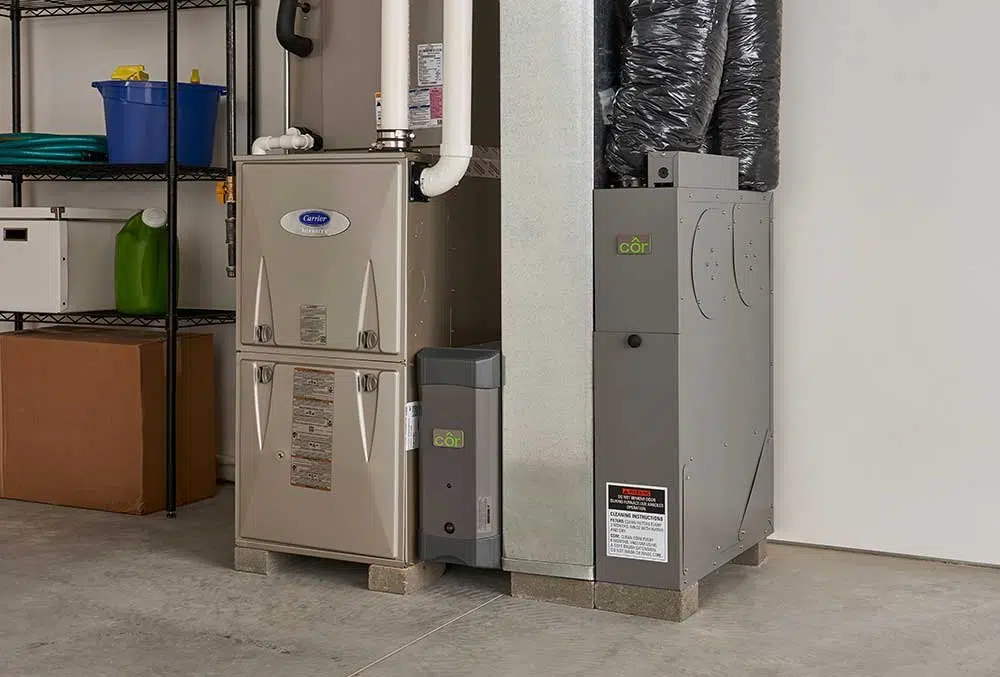
Monthly inspections pick up wear indicators before failure. Technicians can test each element’s resistance, check thermostatic accuracy and measure cycle lengths.
Components most vulnerable to extended thermostat malfunction are heating elements, sacrificial anode rods, thermostatic switches and high-limit cutouts.
Plumbing Stress
Temperature and pressure swings ripple from the tank into the pipework. Overheating expands water and increases pressure, putting stress on joints, seals, and valves. This can result in leaks, expedited corrosion, or in severe cases, a burst pipe.
Installing or ensuring the operation of a temperature and pressure relief valve gives you a critical safety checkpoint. After thermostat repairs, monitor pipes for signs of stress: small drips, new noises, or thermal cycling visible in fixtures.
Log findings and provide them to support staff to avoid downstream breakage.
Associated Risks
A malfunctioning water heater thermostat can pose numerous risks in terms of safety, property, and health. The thermostat regulates how hot the water becomes and when the element or burner cycles. When it doesn’t, temperatures fluctuate wildly, wiring overheats, and seals or tanks leak. This part describes the key risks and red flags.
One of the main dangers is scalding. If the thermostat sticks or misreads temperature, water can reach dangerously high levels without a shutoff. Scalding can occur in a matter of seconds with temperatures over 54°C (130°F). In households with kids, seniors, or those with decreased skin sensitivity, the risk is even higher.
Water temperature fluctuation in a shower, those unexpected stabs of hot water followed by cold, often indicates thermostat trouble and increases scald risk since users do not have time to react.
Electrical fire is a significant risk. Thermostats and their wiring rest in proximity to heating elements and circuit panels. A broken thermostat or loose connection may lead to arcing, overheating and insulation breakdown.
Voltage readings greater than a volt on anticipated low-voltage control circuits indicate an issue requiring prompt inspection by a licensed electrician. Don’t take low current for low risk. A small, constant fault left unattended can start a fire.
Water damage trails when leaks pop up. Leaks aren’t always disastrous, but even a minor constant drip can ruin floors, walls, cabinets, and structural timbers. Leaks can be caused by a bad thermostat-related part, corrosion at the tank, or loose fittings.
Rusty, muddy, or foul-smelling hot water can be a sign of corrosion inside the tank, which often foreshadows leaks. Early detection minimizes repair expenses. For instance, a slow leak under a tank left for months can destroy a subfloor and cause mold remediation, which multiplies the cost.
Health risks lurk outside of burns and water damage. Bacterial growth, Legionella in particular, occurs when temperatures fall below safe thresholds. A thermostat that doesn’t heat enough can let bacteria multiply.
Dangerously high ‘kill the bacteria’ settings increase scald risk. To strike the right balance between these concerns, you need a working thermostat and regular monitoring.
Proactive measures reduce these threats. Be aware of temperature fluctuations while in use, test water for smell and discoloration, visually check wiring, and monitor for leaks.
With regular checks every few months and replacement planned around 10 years of service, you can avoid unexpected failure. If you observe voltage surges, smell burning, rapid temperature changes, or rusty water, turn off power and water and call a professional.
Conclusion
Your water heater thermostat is on its way out if it displays the following obvious, consistent symptoms. Hot water that drops quickly, big temperature swings, cold water that lingers, or the heater that runs non-stop all lead back to the thermostat. Examine the thermostat, test the element, and monitor the voltage. Minor repairs such as cleaning connections or replacing a defective thermostat usually put an end to the issue. If left unchecked, a bad thermostat drives up energy costs, shortens the heater’s life, and increases safety risks such as scalds and electrical faults. For an easy repair, diagnose and swap out the thermostat. For challenging or ambiguous problems, call a licensed technician. Need a step-by-step checklist or part recommendations for your specific model? You ask and I’ll deliver.
Frequently Asked Questions
How can I tell if my water heater thermostat is failing?
A malfunctioning thermostat leads to irregular water temperatures, either lacking hot water or overly hot water. Here’s what to look for: sudden changes after no plumbing work. Verify with temperature measurements at various faucets.
Can I test the thermostat myself?
Yes. Turn off power, remove access panel, and test all with a multimeter for continuity or voltage according to the manufacturer’s guide. If you’re not certain, hire a licensed technician for safety and peace of mind.
Will replacing the thermostat fix all water temperature problems?
Not necessarily. While replacing a thermostat will generally fix control issues, heating elements, sediment build-up, wiring, or the tank itself may be to blame. Troubleshoot before you replace.
How much does a thermostat replacement usually cost?
Prices depend on location and model. Anticipate parts and labor. Easy tank thermostat replacements are typically inexpensive to moderately priced. Obtain written quotes from reputable plumbers or electricians.
Is a failing thermostat dangerous?
Yes. Scalding water or bacteria growth can occur depending on whether the thermostat gets stuck on or stays too low. It can short circuit too. Treat failures like that as soon as possible to minimize danger.
When should I call a professional?
Call a pro if you’re unsure, uncomfortable with electrical work, observe corrosion, or your test shows irregular readings. Experts provide safe diagnostics, code compliance, and proper repairs.
Can thermostat settings prolong my water heater’s life?
Yes. Dialing the thermostat down to a safe, recommended temperature, typically between 49 and 60 degrees Celsius or 120 and 140 degrees Fahrenheit, minimizes stress on parts and reduces energy consumption, which can contribute to a longer lifespan.