


Key Takeaways
- Hear and see obvious signs like hissing, frost on coils or lines, oily residue, inconsistent heating, and increasing energy bills that indicate the heat pump is low on refrigerant. Record what you see for the technician.
- Low refrigerant results in less heating capacity, cold spots, prolonged run times, and excessive energy consumption. It can stress or even ruin components such as the compressor if left unchecked.
- Typical root causes are mechanical wear, corrosion, and installation defects. To prevent repeat leaks and protect system longevity, it’s essential to identify and fix the underlying cause.
- Your repair technician will use pressure gauges, electronic leak detectors and dye testing to confirm leaks and refrigerant levels. Save DIY efforts that can exacerbate the problem or violate codes.
- Never simply add refrigerant without fixing leaks. It’s a stopgap, it can harm the environment, it may void warranties, and it causes you ongoing expense and damage.
- Do a professional repair that finds the leak and seals it, repairs or replaces damaged parts, and then recharges the system to manufacturer specs while keeping records for warranty and follow-up checks.
Signs your heat pump needs refrigerant include decreased heating or cooling output and extended run times. Other common signs are ice on the outdoor coil, hissing sounds, and higher energy bills.
Low refrigerant causes uneven room temperatures and short cycling. A professional tech can confirm leaks and measure pressures to correct the issue.
Here are definitive, actionable signs and easy fixes.
Refrigerant Deficiency Signs
Refrigerant deficiency, particularly low freon levels, manifests itself in very concrete ways. Here is a numbered list of the primary signs, including warning signs like a hissing sound from the indoor unit, with targeted subheads underneath that describe what to look for, where to check, why it is important, and how long a sign should stick around before you take action.
- Reduced heating or cooling capacity: System fails to reach or maintain the thermostat setpoint, longer run times and increased use of auxiliary heat, tepid air from vents on scorching days, cold spots in rooms or uneven temperature.
- Persistent frost or ice: Evaporator coil or refrigerant lines show ice build-up that does not clear during normal defrost. Frost on the outdoor unit is beyond normal light frosting. Ice remains after 30 minutes post normal cycling.
- Unusual noises: Hissing or gurgling from the indoor or outdoor unit that continues across cycles signals a pressurized leak or refrigerant movement in a damaged line.
- Higher energy use: Noticeable spikes in monthly bills, extended run times over previous seasons, and no noticeable drop in efficiency that would be expected to accompany suspected refrigerant loss.
- Visible oily residue: Oily spots or stains on refrigerant lines, connections, or around coils. Greasy residue where escaping refrigerant has whisked compressor oil out of the system.
- Dehumidification decline: The system takes far longer than typical to reduce humidity, which is more than ten minutes to start showing effect, or the home remains damp despite operation.
1. Inadequate Heating
Watch for the heat pump not maintaining or achieving the thermostat’s set temperature in cooler weather. Small temperature differentials to start can amplify.
Back-up heat running longer than 30 minutes repeatedly indicates the primary system isn’t keeping up. Search for cold rooms or uneven heat that didn’t exist previously.
Low airflow or supply registers blowing cold air when the system should be heating is a definite sign a technician should inspect refrigerant and airflow at the same time.
2. Frost Accumulation
Signs of Refrigerant Deficiency: Check coils and copper lines for ice that won’t clear in normal defrost cycle. A little frost on the outside unit is typical, but ice that lingers after the system cycles off or lasts for more than 30 minutes is not.
Melting frost can cause water to puddle around the unit and conceal slow leaks. Stubborn ice in the cold and warm seasons alike indicates low refrigerant or a failed defrost control.
3. Audible Hissing
Be alert for any hissing or gurgling from the unit. These noises typically indicate refrigerant is leaking or air pockets are developing in pipes.
Distinguish normal fan and compressor noise from persistent hissing that recurs every cycle. Act rapidly; a persistent leak will escalate and degrade system performance.
4. Increased Bills
Monitor monthly energy consumption. Meter History – compare current consumption to previous periods.
Unexplained increases during the cooling season are usually linked back to low refrigerant and extended run times. Record readings pre and post repair to measure savings.
5. Oily Residue
Look for oil around lines, valves, and connections. Oil stains indicate that refrigerant has leaked and taken lubricant along with it.
Indoor and outdoor checks both count. Treat oily residue as a trigger to contact a trained professional.
Underlying Causes
Low refrigerant rarely just materializes. It typically is the result of certain scenarios or faults that cause refrigerant to leak or compromise system efficiency. Here, in brief, are the usual culprits followed by concentrated discussions of mechanical wear, corrosion damage, and installation errors.
Identifying the root cause matters. Topping up refrigerant without fixing the source invites repeat leaks, lower efficiency, and earlier system failure.
- Loose fittings or worn valves
- Physical damage to lines (punches, kinks, rodent chew)
- Corrosion on copper lines, coils, or joints
- Poor or improper installation (bad brazing, wrong refrigerant)
- Manufacturing defects in seals or compressors
- Vibrations and thermal cycling causing hairline cracks
- Chemical exposure or salt air accelerating metal breakdown
- Neglected maintenance (dirty filters, blocked airflow) causing strain
- Repeated or excessive cycling from humidity or heavy use
- Leaky ducts increasing load and masking system symptoms
Mechanical Wear
Moving parts and joints degrade over time. Valves, service ports, and threaded fittings loosen. Vibration from compressors and fans causes these micro gaps to grow into leak paths.
Rapid cycling and heavy use, both of which are typical in extended cooling seasons, accelerate this wear. A heat pump that was overworked for years or that lies in the 10 to 15 year range is at much greater risk.
Watch out for loose fittings, oil stains around joints, or noisy compressors. Regular inspections with a pressure test and visual inspection of seals identify wear at an early stage and minimize the risk of a significant refrigerant leak and unscheduled downtime.
Corrosion Damage
Copper and aluminum parts corrode upon contact with moisture, chemicals or salty air. Coastal homes and high-humidity climates speed this up.
Check lines and connectors for greenish or whitish deposits; those deposits are a sign of active corrosion. Pinhole leaks form in corroded coils, beginning as tiny leaks and widening with time.
Ice on the outdoor unit in warm weather can indicate a refrigerant leak that is made worse by decreased heat transfer from corroded surfaces. Swap out corroded parts as soon as possible.
Corrosion tends to spread, and putting off a repair can result in bigger leaks, higher bills and premature system death.
Installation Flaws
Bad brazing, bad fitted joints, or simply using the incorrect refrigerant type can lead to leaks from day one or enable slow losses later. Overcharging or undercharging shifts pressures and stresses seals and the compressor.
Bad line routing can expose sections to physical damage. If you have installation concerns, ask for a professional inspection and pressure test.
A good technician can check the right refrigerant charge, repair bad connections, and confirm the system was engineered to last. Repairing installation issues stops repeat leaks and boosts durability.
System Damage
System damage. Low refrigerant stresses the system, causes components to overheat, and accelerates wear. Leaks allow moisture and air into the circuit, which corrodes coils and impedes heat transfer.
Over time, this wear decreases efficiency and reduces the system’s lifespan. Routine maintenance and early leak repair contain damage. Aging units and shoddy installation cause more frequent damage and more frequent repairs.
Compressor Failure
| Sign | What it means | Typical outcome |
|---|---|---|
| Loud humming, clanking, or rattling | Motor or internal valves stressed | Early failure or seizure |
| Repeated tripping of breakers | Overcurrent from hard start | Electrical damage or fuse loss |
| Unit fails to start or shuts down | Internal thermal overload | Complete compressor replacement |
| Oil or refrigerant smell | Seal or line breach | Contamination and corrosion |
Low refrigerant makes the compressor work extra hard to move heat, causing it to overheat. Heat reduces the insulation life and can weld the internal parts together.
If your compressor goes, your system locks out and must be completely replaced, which is the most expensive repair in a heat pump. Hear it make funky noises and randomly shuts down all the time.
Don’t put in a new or rebuilt compressor until you fix that refrigerant leak to prevent a repeat failure. Often, the labor and parts are more than just a regular leak fix and recharge.
Efficiency Loss
Your heater or A/C isn’t heating or cooling properly is a direct indication of low refrigerant. The heat pump can’t absorb or release heat properly, so run times lengthen while indoor comfort falls.
Longer cycles consume more energy, which sends your monthly bill and carbon footprint through the roof. For performance, measure run time and temperature delta across the evaporator coil.
A smaller temperature differential and longer cycles indicate low charge. Recharging refrigerant returns heat exchange to specification and reduces operating cost. Clogged filters and improperly installed systems amplify the loss.
Clean filters and proper airflow are important when recharging.
Component Strain
Low refrigerant causes the evaporator coil to become colder and the compressor hotter, which makes the blower motor, expansion device and other components pull double duty. Extra strain inside your heating or cooling system causes motors, bearings, valves and other system components to wear out prematurely.
Anticipate more frequent or short cycling that taxes the entire system. Be on the lookout for reduced component life and repeated issues.
On-time inspections, proper installation, and regular filter replacements go a long way toward avoiding this cycle of destruction. Certain damage, like from extreme weather or old age failure, can’t be helped, yet timely action still restricts scale and expense.
Professional Diagnosis
Professional diagnosis determines if a heat pump requires refrigerant, repair, or replacement by using measurements, inspection, and service history combined. Experienced pros come equipped with tools, benchmarks, and testing protocols that allow them to distinguish between low charge and other issues like dying compressors, dirty filters, or airflow complications.
This step is critical when runtime is extended, heating or cooling is spotty, or energy bills escalate for no particular reason.
Pressure Gauges
Technicians connect special pressure gauges to the service ports of the HVAC system to measure high-side and low-side pressures while the system operates. They contrast those figures with the manufacturer’s specs, ambient temperature, and refrigerant type to determine if the charge is low or if the pressures are due to another defect. Low freon levels can lead to reduced heating capacity and uneven temperatures throughout the home.
Differential pressure abnormalities typically indicate refrigerant problems such as leaks, a plugged metering device, or a compressor going out. For instance, a low suction pressure with a near-normal head pressure may suggest a low charge, whereas both pressures being low may indicate a restriction. Understanding these warning signs is crucial for maintaining the efficiency of your HVAC system.
Capture pre-work readings, then again post-repair or recharge, to verify that the system achieved the proper pressures and that the service indeed restored performance. This history backs warranties and assists in tracing a unit’s health throughout the years, which is handy for heat pumps that tend to last 10 to 15 years.
Using gauges properly requires training, and the wrong gauge choice or misinterpretation can lead to overcharging or missed diagnosis. Regular maintenance and monitoring of refrigerant levels can prevent costly repairs and ensure reliable operation.
Electronic Detectors
Electronic leak detectors are essential for identifying refrigerant leaks that are often invisible and minuscule. A technician utilizes these detectors along refrigerant lines, coil seams, fittings, and brazed joints to ensure the hvac system operates efficiently. Today’s sensors beep or display concentration levels, allowing the engineer to detect even small leaks that could lead to decreased cooling ability and increased energy consumption.
When electronic detection is combined with pressure testing, it enhances diagnosis during high-stress peak seasons, such as summer. Precise leak localization not only minimizes unnecessary parts swapping but also focuses the repair efforts, reducing downtime and preventing additional damage to components.
Professional diagnosis requires calibrated detectors and skilled techniques, as transient false positives can occur near other gases. Therefore, results are often cross-checked by other methods to ensure accuracy and reliability in maintaining optimal refrigerant levels in the system.
Dye Testing
Ultraviolet dye testing is the injection of a tiny quantity of approved dye into the refrigerant circuit, then scanning suspicious areas with a UV lamp to reveal telltale stains. This way, it locates stealth leaks in coils or mysterious joints that detectors or pressure tests overlook.
Dye testing is most helpful when the earlier steps indicate a leak but do not find one. Once fixed, engineers wipe off dye and record results so subsequent testing stays clean and reports indicate repair.
Mixing dye, electronic and pressure methods provides the most professional diagnosis and directs consideration of repair, recharge, or replacement.
The “Just Add More” Fallacy
Just ‘add more’ refrigerant without locating and repairing the leak – the ‘Just Add More’ Fallacy. The ‘just add more’ fallacy exists because who doesn’t believe that topping up refrigerant will fix your cooling or heating problem. No, it doesn’t.
A leak is a symptom, and adding refrigerant addresses the symptom, not the cause. Prior to any recharge, the leak source must be identified, the broken component repaired or replaced, and then recharged to the manufacturer’s specified recommendation.
A Temporary Fix
- Additional refrigerant camouflages pressure loss but does not fix the leak.
- Refilled systems will present symptom relief only until the charge drops again.
- These constant refills increase overall service expenses and frequently necessitate emergency service calls.
- Continuous leaks can cause low charge, which overworks the compressor and reduces component life.
- If the system is older or badly corroded, they could charge you for multiple repairs that cost more than half of a new unit.
Weak airflow, less heating or cooling and longer run times will return as refrigerant seeps out. Just put a pot under the leak reduction because fixing the leak first means less repeat visits and less paying for the same fix again and again.
Demand a permanent repair so the system works well and remains reliable.
Environmental Impact
Leaking refrigerants like older freon blends and certain hydrofluorocarbons are dangerous to the environment. These gases are known to cause ozone depletion and warming. In a lot of jurisdictions, certified handling, recovery, and disposal of refrigerants is mandated to curb emissions.
Fixing leaks stops unnecessary spillage. This involves discovering the leak, patching or replacing corroded lines, or swapping failed components. Her point is that a properly sealed and maintained heat pump uses less energy and keeps refrigerant where it belongs.
Homeowners that take these steps enable green practice and obey refrigerant work law.
Voided Warranties
Manufacturers tend to demand written professional service to maintain warranties. Pumping in refrigerant without a repair can qualify as neglect or improper maintenance. This can invalidate sections of the warranty, leaving owners to foot pricey replacements.
Check your warranty to see if they have required service intervals and repair standards. Keep records: invoices, leak detection reports, and parts replaced help when filing a claim.
Steer away from band-aids that appear cheaper in the moment but peel away future guarding and backing.
Repair Process
A straightforward, practical repair process for an HVAC system with suspected refrigerant problems, such as low freon levels, gets a heat pump back to safe, efficient performance. The steps below describe the complete workflow professionals adhere to, focusing on safety, appropriate tools, and regulatory compliance.
1. Inspection and Leak Detection
Leak Detection
Start with a comprehensive inspection using pressure gauges, electronic leak detectors, and dye testing to identify low-pressure zones and active leaks in your HVAC system. Inspect service ports, access panels, and visual indicators like oil stains or corrosion. Pay attention to the copper refrigerant lines, as they can be common sources of refrigerant leaks.
Apply dye sparingly on systems qualified for it and adhere to manufacturer limits on pressure and temperature during tests. Probe likely leak sites: refrigerant lines, brazed joints, filter driers, coils, and valve stems, especially around the evaporator coil where leaks can cause uneven temperatures.
Leaks there tend to be inaccessible and can take hours to repair, leading to reduced heating and cooling ability. Certain leaks can come from stress on metal tubing due to continual expansion and contraction or installation-day damage.
Identify, mark, and photograph each leak site and record these in the service report. Don’t put any refrigerant in until you locate every single leak and fix it. You can’t add refrigerant to a system that has a leak.
It has to be repaired first so that it can run efficiently and legally, ensuring reliable HVAC performance.
2. Repair and Component Replacement
System Repair
Repair jobs are different, depending on location and severity. Swap out bad valves, coils or copper lines when repair isn’t dependable. Pinhole leaks in small sizes may be repaired by brazing or epoxies but should be done to code and pressure tested.
Tighten and reseal all fittings and replace worn gaskets and O-rings. Utilize authorized replacement components to maintain warranty and performance. Once repaired, the system is pumped out and pressurized to test its integrity.
Test and monitor pressures, temps, and current draw under normal running conditions. Generally, pros are going to track and fix the leak first so everything operates properly and efficiently long term.
Record time for the tricky repair work such as evaporator coil repairs, as these can be time consuming and require specialized equipment.
3. Proper Recharging and Final Checks
Proper Recharging
When the system holds vacuum and has no leaks, recharge with the manufacturer specified refrigerant type and mass. Weigh in refrigerant to the precise charge. Topping off isn’t good because it hides losses and can damage performance.
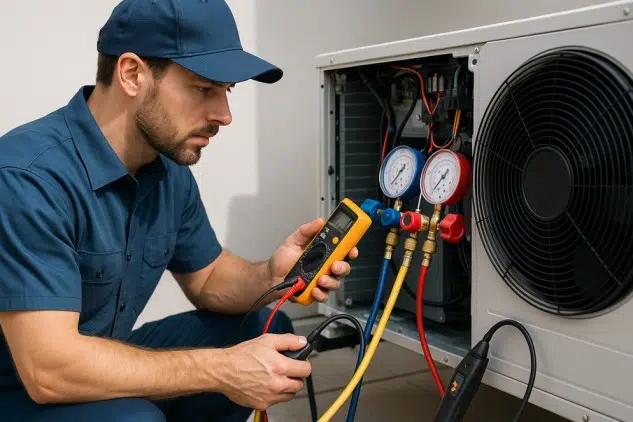
Balance system pressures, superheat, and subcooling to verify the best possible heat transfer. Observe the unit to see if it remains stable and the temperatures are consistent over several cycles.
Follow up checks to verify long-term leak repair effectiveness. Maintain records of tests, replaced parts, type and weight of refrigerant, and regulatory paperwork for warranty claims and future service.
If you don’t repair leaks in a timely manner, you can get damage that can’t be undone and pay higher energy bills.
Conclusion
Low refrigerant shows up in clear ways: weak cooling, long run cycles, frost on lines, and higher bills. These symptoms connect to leaks, subpar installation or worn components. Left alone, the system wears faster and parts break. A trained tech can detect leaks, pressure test, and repair or replace. Just adding refrigerant masks the actual problem and shortens system life. Minor repairs tend to be less than replacements. For instance, a pinhole leak discovered and sealed saves months of waste and a larger bill down the road. For a safe bet, choose a certified expert who performs proper charge and leak testing. Schedule a check if you notice the signs. Book a technician or request a pressure test today.
Frequently Asked Questions
What are the most common signs my heat pump needs refrigerant?
Typical symptoms of HVAC issues include decreased heating or cooling, frost or ice buildup on the exterior unit, hissing sounds indicating refrigerant leakage, and elevated energy costs due to low refrigerant levels, which require investigation.
Can low refrigerant cause my heat pump to freeze up?
Yes. Here’s why: Low refrigerant levels can cause evaporator coils to become too cold, leading to frost or ice build-up. This results in reduced air flow and efficiency, potentially harming the HVAC system if unrepaired.
Will adding refrigerant myself fix the problem?
A DIY refill can mask a refrigerant leak, posing a safety and environmental hazard. A qualified technician should find low freon levels, fix them, and properly charge the HVAC system.
How does low refrigerant affect system efficiency and bills?
Low refrigerant levels make your HVAC system work harder, leading to increased energy consumption and costs. Fixing refrigerant leaks and recharging your system saves energy and money.
Could low refrigerant damage my heat pump long-term?
Yes. Running a heat pump with low refrigerant levels can overwork the compressor, leading to early failure and uneven temperatures. Early diagnosis and repair save your HVAC system and prevent expensive replacements.
How does a professional diagnose a refrigerant issue?
Technicians utilize pressure gauges, leak detectors, and temperature and pressure measurements to identify refrigerant leaks. They examine parts, locate leaks, and verify refrigerant levels to ensure your HVAC system operates safely and efficiently.
How long does it take to repair a refrigerant leak and recharge the system?
Most repairs and recharges, especially for HVAC systems, require one to four hours, depending on the leak location and parts needed. A quality leak test and charging ensure a repair that lasts and a unit performing at its best, maintaining optimal refrigerant levels.