


Key Takeaways
- Figure the basement heat load using the actual slab area, your local climate, and heat loss through the floor, walls, and ceiling to size your boiler correctly and avoid short cycling.
- I like condensing boilers for high efficiency with low temperature radiant floors, but non-condensing may be better for easy retrofits and electric boilers where no gas is available.
- Check the boiler turndown ratio and modulation to match partial loads of slab heating. This enhances temperature regulation and minimizes fuel consumption.
- Verify venting requirements and code for below-grade installation. Opt for units with multiple flexible venting options if space or termination locations are tight.
- Design controls and zoning with floor temperature sensors and setback schedules safeguard the slab, enhance comfort, and maximize energy savings.
- Weigh initial installation cost, fuel access, and long-term efficiency in choosing the boiler. Incorporate slab insulation, thermal mass, and moisture barriers into the design of your system.
How to choose a boiler for in floor heat in a Minnesota basement slab depends on heat load, boiler type and efficiency. Factor in ground floor area, slab thickness and insulation to size the boiler in kilowatts or BTU. Pick modulating condensing boilers for steady output and high AFUE. Align pump flow and manifold zones, provide for freeze protection and consider local codes and fuel sources to complete the selection.
Heat Load
Start by taking the total square footage of the basement slab. In that 360 ft² slab, is that exposed concrete or finished with tile or engineered flooring? Finishes alter the thermal mass as well as the surface resistance. Multiply the slab area by the design heat flux for radiant floors, which ranges from 70 to 120 W/m² depending on insulation and temperature. Convert units: 360 ft² equals about 33.45 m². At 70 W/m², that yields approximately 2.34 kW, and at 120 W/m², about 4.01 kW. Apply the bottom end for well-insulated slabs and the top for bare cold slabs.
Consider climate, insulation and window area next. Minnesota’s winters are cold enough to drive design temperatures down, so size with local design outdoor temperatures. Bad perimeter insulation, uninsulated slab edges or slab-on-grade details add to required output. Include wall and rim-joist insulation R-values, floor coverings and window areas and U-values. For instance, a basement with R-20 walls and small high-performance windows will require less boiler capacity than a basement with R-5 walls and large single pane windows. Add 10 to 30 percent capacity when slab edge is exposed or insulation is below recommendations to prevent undersizing.
FYI, you can find out heat loss through the floor, walls, and ceiling by doing a room-by-room heat loss estimate. Break the basement into components: slab, perimeter walls, common walls to conditioned space, and any exterior doors or windows. For the slab, calculate conduction loss with slab area, U-value of slab assembly, and delta-T between interior set point and design outdoor temperature. For walls and windows, use area multiplied by U-value multiplied by delta-T. For the ceiling, if above unconditioned crawl or ground, add a separate U-value. Add them all up for total steady state heat loss. For instance, our 33.45 m² slab with a U of 0.5 W/m²·K and 35 K delta provides approximately 585 W, plus wall and ceiling losses as appropriate to make the total heat load.
Check that basement heat load against your whole-house load to sidestep incorrect boiler sizing. If the basement load is a tiny percentage of the house, a modulating condensing boiler with low-fire capability is better to avoid short-cycling. If the basement is a big portion, such as a walk-out or finished lower level, size the boiler to cover both zones or supplement with a small boiler or water heater for the slab. Think buffer tanks, outdoor reset controls, and multiple zones to better match output to load and improve efficiency during shoulder seasons.
Boiler Types
Minnesota basement slab – choosing a boiler for in-floor heat starts with knowing the main boiler types and how they respond to low-temperature hydronics. Here’s a scoping down of condensing, non-condensing, and electric boilers, their suitability for radiant floor heat, efficiency characteristics, and compatibility with whole-house systems.
Condensing Boilers
Condensing boilers are the best choice for radiant floors, typically achieving 90 to 98 percent seasonal efficiency when properly sized and operated. They recover latent heat from flue gases by condensing water vapor, so they operate optimally with the lower return water temperatures that slab systems typically deliver. That translates into more efficient fuel consumption and reduced bills in the long run, particularly in colder regions that see longer run times.
Installers will have to provide the appropriate stainless or PVC venting and a condensate drain sized for acidic condensate. Mounting it on a basement slab near a floor drain makes handling condensate easy. Condensing units pair well with mixing valves or outdoor reset controls to maintain supply temperatures in the 35 to 55 degrees Celsius range, well below what is needed for concrete slabs, increasing comfort and decreasing cycling. They work seamlessly with baseboard or hydronic fan coils to force air back up. A separate heat exchanger or dual system control is often employed.
Non-Condensing Boilers
Non-condensing boilers are simpler and frequently less expensive initially, which is why they’re a convenient retrofit option where the old high-temp piping or chimney venting still exists. They need to run hotter, typically between 60 and 80 degrees Celsius, which is less optimal for slab-based radiant floors and can decrease efficiency in that application.
These units require conventional metal flues or chimneys and generally don’t generate condensate, sidestepping drain work while forgoing the additional energy recapture. In a MN basement, a non-condensing boiler can work if mixed systems or buffer tanks reduce water temperature to the slab, but be prepared for increased fuel consumption. For baseboard and slab combined homes, non-condensing boilers can feed both, but you might want separate zones and tempering valves to safeguard the floor system.
Electric Boilers
Electric boilers are compact, quiet, and easy to install, typically hanging on a wall in small basements not blessed with good ventilation opportunities. They work where gas lines do not exist and where installation expense or site limitations eliminate combustion appliances. The efficiency is good as well, practically 99% at the point of use, but electrical energy costs must be benchmarked against gas or oil to evaluate operating cost.
They go great with well insulated slabs and when combined with a proper controller can act as zoned sources for entire houses. For forced air or baseboard integration, electric units can supply the same hydronic circuits or serve as a supplemental source in hybrid setups. Consider local electricity rates and peak demand charges.
Selection Steps
Selecting the appropriate boiler to power in-floor heat in a basement slab is a stepwise process that connects heat demand, fuel, modulation, venting, and controls all together. Follow a process to make sure every decision matches the slab’s heat load, basement conditions, code requirements, and long-term serviceability.
1. Calculate Load
Select steps. Apply local climate information, including outdoor design temperature and indoor design setpoint, to run a heat-loss calculation that factors in slab conduction, slab-to-ground losses, and foundation wall and rim joist perimeter heat loss.
Size the boiler from the net heating load, not peak momentary spikes. Add distribution losses and pump head. Avoid oversizing: a boiler rated too high will short cycle, waste fuel, and increase wear. Consider recording room- or zone-by-zone loads and summarizing assumptions in a simple table with columns for area (m²), U-values, temperature difference, and watts calculated. That table simplifies comparing boiler outputs.
If the slab will have big glass or under insulated walls, add contingency for those areas instead of a blanket oversize. Record insulation levels, ground conditions, and any internal gains assumed in the calculation.
2. Match Fuel
List available fuels: natural gas, propane, electricity, or district heating. Step 2: selection steps. Contrast present local unit prices per kilowatt-hour or megajoule. Convert to annual operating cost based on load hours calculated. Add in delivery certainty and forward price risk.
Consider emissions and carbon intensity as applicable. Electric boilers produce no onsite combustion byproducts but can be more expensive and tax electrical service. Gas boilers may be less expensive to operate in many areas but require suitable flue and combustion air. When possible, match fuel choice to the house’s systems in place to keep maintenance and spare parts simple.
3. Verify Turndown
Check manufacturer turndown ratio. Common values range from 5 to 10. Radiant floor loads are low and slow. A high turndown cuts cycling and keeps the slab temperature consistent.
Match modulating output curves to your minimum required load. If a boiler’s minimum firing rate is higher than the slab’s low load, back it up with buffer volume or a small tank to avoid short cycling. Note turndown as a pass or fail item on the checklist.
4. Check Venting
Confirm vent type: natural draft, direct vent, or power vent. Below-grade installations require specific termination considerations to prevent back-drafting and moisture penetration.
Design vent runs to code and manufacturer limits. Favor flexible venting if routing is limited. Other selection steps may include inspection of adjacent openings, clearances, and condensate disposal for condensing units.
5. Plan Controls
Create zones with individual thermostats or floor sensors for uniform comfort. Select controls that communicate with the boiler modulating input and incorporate setback schedules.
Use floor probes to limit maximum slab temperature. Make sure boiler control protocols are compatible with your home automation or HVAC controls. Create a final checklist: load numbers, fuel choice, turndown, vent route, control strategy, maintenance access, and documentation.
Efficiency Ratings
Efficiency ratings indicate the percentage of fuel a boiler converts into heat. AFUE (Annual Fuel Utilization Efficiency) is the standard for boilers and furnaces and indicates the percent of fuel converted to heat in an average year. A 90% AFUE boiler uses 90% of the fuel for heat, and exhaust and standby losses account for the other 10%. For in-floor heat under a basement slab, AFUE is a starting point but is far from the entire tale.
Compare AFUE ratings across boiler types to identify the most efficient units
Condensing boilers typically achieve AFUEs of 90–98% as they extract heat from exhaust gas through the process of condensing water vapor. Non-condensing cast-iron boilers generally fall in the 80–86% AFUE range. Modulating-condensing gas boilers provide tight output control and keep AFUE high at almost any load, which is relevant in basements that experience long low-load stretches. Electric boilers can come close to 99% conversion at the unit level, but the upstream generation losses drag their effective efficiency measured at the grid lower. Biomass and pellet boilers use other ratings. AFUE, for example, can be 70–90% and is based on fuel quality and feed control. Select condensing, modulating units in locations with natural gas or propane availability and adequate venting.
Prioritize high-efficiency models to reduce long-term energy bills and environmental impact
High AFUE reduces fuel consumption and operating cost. In Minnesota climates where floors have to counter conductive losses through slab and ground, even AFUE points save serious fuel over winters. High-efficiency units cut greenhouse gas emissions per unit of heat. Condensing boilers require lower return-water temperatures in order to condense efficiently. For slab radiant, I typically design supply temps around 35–45 C˚ (95–115 F˚) where possible to allow the boiler to run in condensing mode. If the system requires high temperatures, efficiency ratings fall and a non-condensing or hybrid solution may be more appropriate.
List efficiency ratings in a table for side-by-side comparison of top floor heating systems
| System type | Typical AFUE (%) | Notes |
|---|---|---|
| Modulating-condensing gas | 92–98 | Best for low-temp radiant; needs low return temps |
| Standard gas condensing | 90–95 | Good balance of cost and efficiency |
| Non-condensing cast-iron | 80–86 | Robust, higher temp systems, lower cost upfront |
| Electric boiler | ~99 (unit) | High unit efficiency; grid losses vary by region |
| Biomass/pellet | 70–90 | Renewable option; needs space and maintenance |
Factor in both boiler and system efficiency, including distribution losses in the floor heating system
System efficiency combines boiler AFUE with distribution losses, which include pump power, pipe heat loss, and slab thermal mass. Long runs, thinly insulated slab edges, or too-large supply temperatures add to losses. Use properly sized pipes, usually 10 to 16 mm for loops, insulation under and around the slab, and zoned controls to reduce distribution losses. We include pump energy in lifecycle costs because high-efficiency ECM pumps drastically reduce electricity usage. Run a simple calculation: System efficiency is approximately AFUE multiplied by one minus the distribution losses fraction. Try to keep distribution losses low to avoid wasting the boiler’s rated efficiency.
Installation Costs
Installing a boiler for in-floor heat in a basement slab has obvious cost buckets. You’re looking at roughly $15,000 in total project cost when you factor in the boiler unit, distribution piping and manifolds, controls and thermostats, insulation and slab prep, as well as skilled labor. For a standard Minnesota basement slab (90–140 m²), you’re looking at a total installed cost between $7,000 and $18,000. The low end represents straightforward, high-efficiency condensing boilers with minimal piping. The higher end accommodates larger homes, combi or modulating systems, and complicated slab work or structural access.
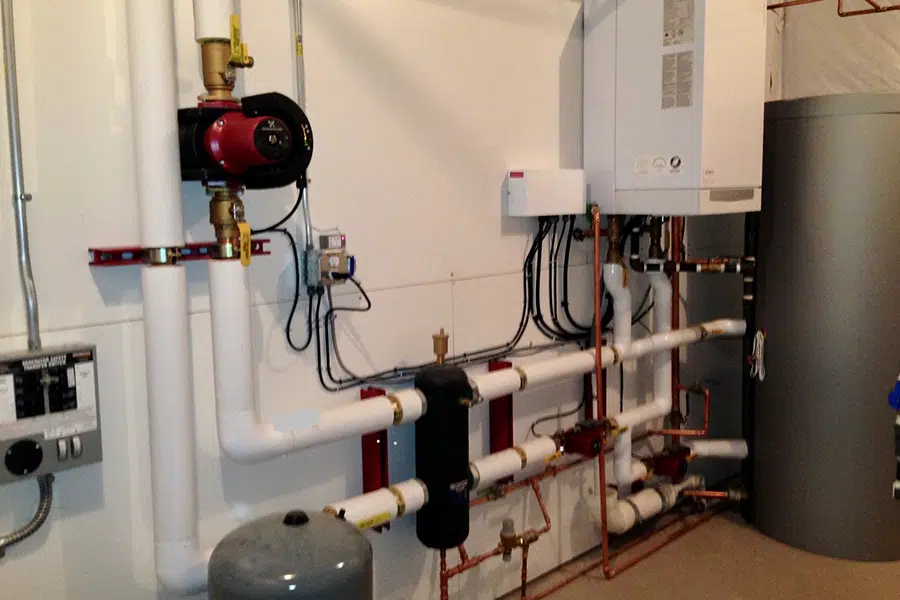
Estimate total installation costs, including boiler unit, piping, controls, and labor for a basement slab application
Boiler unit: standard condensing boilers suitable for hydronic slab work commonly cost between 2,000 and 6,000. Combi boilers or premium modulating-condensing models range from 4,000 to 8,000. Piping and manifolds: expect costs between 800 and 2,500 for PEX tubing, manifolds, fittings, and insulation, depending on loop count and layout. Controls and thermostats: basic zoning boxes and a few thermostats run between 300 and 900; smart or multi-zone control systems add between 800 and 2,000. Slab prep and insulation: cutting grooves, adding thinset or thermal screed, and edge insulation typically cost between 700 and 2,500. Labor: certified plumbing or HVAC labor for a basement slab install usually totals between 2,000 and 6,000 depending on complexity and local rates. Include allowances for disposal and permits, usually between 200 and 600.
Break down costs for each boiler type to highlight differences in upfront investment
Cast-iron non-condensing boilers cost between 1,500 and 3,000 for the unit, but they are less efficient. They may need larger sizing, which increases piping and fuel costs. Condensing gas or propane boilers have a unit cost of 2,500 to 6,000, with a higher upfront price but better efficiency. This often reduces system size and long-term fuel spending. Electric boilers have a unit cost of 1,000 to 3,000. They have lower mechanical complexity but higher operating costs where electricity rates are high. Combi boilers cost between 4,000 and 8,000, but they save space and add domestic hot water, which reduces the need for a separate water heater. Each type impacts venting and electrical work needed.
Account for additional expenses such as venting, electrical upgrades, or fuel line extensions
Venting adds 200 to 1,200 for direct-vent pipes, chimneys, or stainless flues. Condensing units need a condensate drain and corrosion-safe venting. Electrical upgrades may require small pumps and controls to have a dedicated 120/240 V circuit and panel work costing 300 to 1,200. Fuel line extensions typically add 300 to 1,500 for natural gas line runs or meter upgrades. Propane tank hookups and regulators vary widely. Condensate neutralizers, backflow preventers, and permits add small but legitimate fees.
Balance installation costs against expected energy savings and maintenance requirements
Compare lifecycle costs: Higher-efficiency condensing boilers cost more up front but can cut fuel use by ten to thirty percent, which can pay back in years. Maintenance: Simple systems have lower annual service costs of around one hundred to two hundred dollars, while combi or modulating systems may need specialized service for one hundred fifty to three hundred dollars per year. Model the payback using your local fuel prices, seasonal degree-days, and an expected system life of fifteen to twenty years.
Slab Dynamics
Concrete slab thickness and the degree of insulation below and around the slab affects how a radiant floor system acts. Thicker concrete retains more heat and increases the system’s thermal mass. That keeps the slab warm longer but reduces the rate at which the room heats or cools. When it comes to a usual Minnesota basement slab, 75 to 150 mm (3 to 6 in) is typical for finished slabs over tubing, whereas structural slabs can be thicker. If you add screed or a topping layer, consider that depth when sizing your boiler and control strategies. Insulation under the slab, like 50 to 100 mm of rigid foam with a perimeter edge insulation strip, slashes heat loss into the earth and boosts performance. Insulation that is either inadequate or absent entirely makes the boiler work harder and waste energy.
Thermal mass means slow response. Slab Dynamics A slab can take hours to reach setpoint and hours to cool down after the boiler turns off. This impacts comfort in rooms requiring rapid temperature changes. To deal with this, deploy weather-compensated controls, indoor thermostats with predictive heating algorithms, or simple time-based schedules that begin heating earlier. For demand rooms, such as bathrooms, requiring quick turn-around, mix slab heating with a mini-forced air unit or electric radiant mats in a thin layer. For example, a basement workshop that needs occasional quick warmth can use the slab for base heat and an electric heater for short boosts.
Placement of tubing or electric elements controls evenness and performance. For hydronic tubing, keep loops less than about 90 to 120 meters to maintain flow and even temperature. Space slabs at 150 to 200 millimeters intervals for living spaces and 100 to 150 millimeters for areas adjacent to exterior walls or cold floors. Position tubing at approximately slab mid-depth or just above the structural slab if there is a dedicated screed layer. This balances heat transfer and slab strength. For electric systems in thin slabs, refer to manufacturer depth recommendations and steer clear of positioning under heat-blocking heavy fixtures, such as toilets. Manifold zoning allows you to isolate zones and balance flow rates.
Basement moisture impacts durability and indoor air quality. Minnesota basements are used to high ground moisture and random water attacks. Put one unbroken vapor barrier under the insulation and slab to prevent moisture from wicking up into the concrete. Seal joints and penetrations and think about capillary break layers where appropriate. Slab Dynamics – If the basement exhibits symptoms of hydrostatic pressure or old leaks, take care of draining and perimeter waterproofing prior to implementing slab heating. For wet basements, select boiler and control components designed for elevated moisture and schedule semi-annual inspections to detect corrosion or insulation breakdown.
Conclusion
Select a boiler that is sized to the heat load of the slab and the home. Select a boiler variety that suits the space, fuel availability, and regional servicing availability. Prefer units with transparent efficiency ratings and an appropriate modulating range for low-temperature floor heat. Account for slab dynamics: pipe layout, insulation, and thermal mass change how the system runs. Plan for increased installation cost in basement slabs where you have to do slab work or additional insulation. Use a professional to size the boiler, check local code, and set controls for outdoor reset and zoning. A small example is that a three to four kilowatt per square meter load often works with a modulating gas condensing unit and smart control. Call an authorized installer and have them visit your site for a written estimate.
Frequently Asked Questions
What heat output (kW or BTU) do I need for a Minnesota basement slab with in-floor heat?
Do a heat load based on room size, slab insulation, and local winter design temperature. Generally, basements require 40 to 80 watts per square meter, which is 13 to 26 BTUs per square foot. Start with a professional heat-loss calculation to determine the precise size.
Which boiler type works best for slab radiant floor heating?
Modulating condensing gas or propane boilers are best. They offer low water temperatures and high efficiency. Electric boilers are a good option for small systems, but they are more expensive to operate in cold climates.
How important is boiler modulation and outdoor reset for slab systems?
Extremely important. Modulation matches output to demand and cuts cycles. Outdoor reset drops supply water temperature for both comfort and condensing efficiency. Both conserve fuel and prolong boiler life.
What efficiency rating should I look for in a boiler for Minnesota winters?
I would recommend a condensing boiler with at least 90% AFUE. Higher efficiencies bring lower fuel bills and better performance with low-temperature slab systems.
How do slab dynamics affect boiler selection and system design?
Slabs have thermal mass and slow response. Employ lower water temperatures and a buffer tank or thermal mass control. Size boilers to handle sustained loads, not rapid changes, to avoid short cycling.
What are the typical installation cost factors for a basement slab radiant system?
Prices differ by boiler type, system size, controls, insulation, and slab prep. Key drivers are boiler price, labor, manifold and pump installation, and any required slab cutting or insulation upgrades.
Do I need a buffer tank for an in-floor slab system?
Frequently so. A buffer tank prevents short cycling with low-mass boilers. It tempers supply temperature and tracks the slow thermal response of the slab, making the system more efficient and comfortable.